
Ever since the surprising commercial success of the Rocket Espresso Cup, I’ve been on the lookout for new design opportunities, with espresso cups naturally taking a prominent role in my daydreaming.
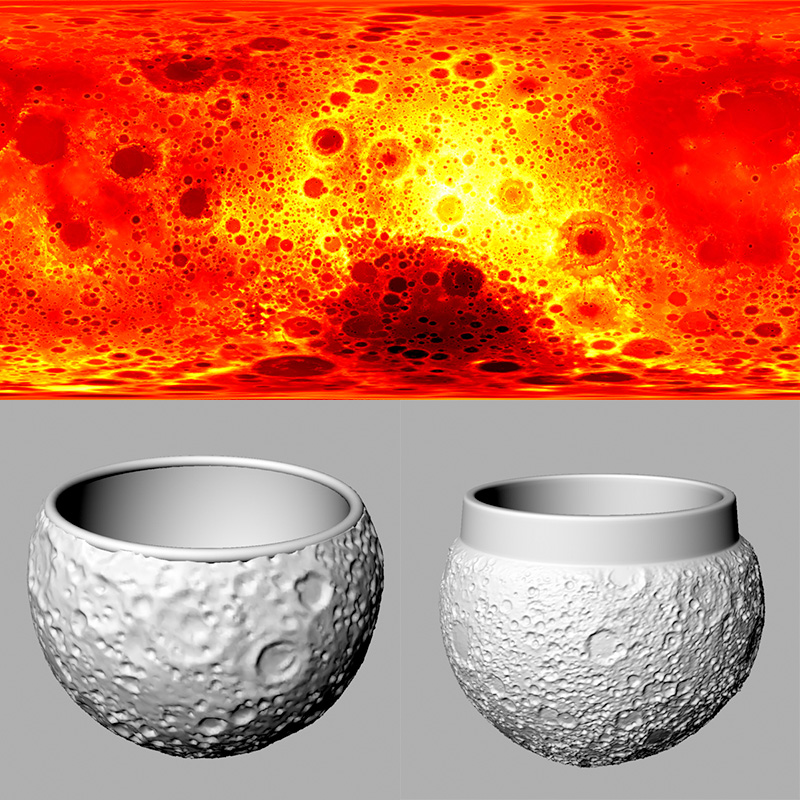
This daydreaming took on a more precise focus last year. I was contacted by the head of a space tourism company, who was looking for a unique gift to give clients. He was interested in custom 3D espresso cups in the Rocket Cup vein. In the prototyping that followed, I became excited about the possibility of producing a new cup based directly on the moon: a modified sphere modulated by a height map of the lunar surface. After a bit of online searching, I located a ready-made height map of the moon, based on data from the Japanese Kayuga orbiter’s laser altimeter (who’s living in the future? I am!). It wasn’t hard to hack together some Python code to read the height map and construct a roughly spherical mesh in which vertices have been displaced by lunar altitude samples. It took a bit more work to generalize the script, scaling the height field gradually to merge the round cup body with a smooth rim. Naturally, the height field must also be grossly exaggerated relative to scale, in order for the tiny cup to bear any surface detail at all!
The contact with the original customer fizzled, but I was eager to see this new cup through to completion. I decided to print one for myself, and sent the model to Shapeways for printing in ceramic. Pretty quickly, they rejected the model. The ceramic printing process simply didn’t offer enough resolution to capture the fine details of the cup, and furthermore their glazing process would likely obliterate whatever details might have survived. And so, in April 2013 I put this project on hold, waiting for a new opportunity to get the cup manufactured.
A new opportunity materialized early this year, as I began to develop a relationship with the ceramics experts Zachary Eastwood-Bloom and Ellie Doney at the Institute of Making at UCL in London, where I’ve been spending my sabbatical. I had already had some productive conversations with Linda Carson about fabricating the cup by hand, but here I suddenly found myself with all the ingredients I needed in one place: space, time, sculpting supplies, a 3D printer, and a group of people willing and able to invest a lot of time in helping me. And so, from February to July, we worked in short bursts of activity to create a ceramic moon-shaped cup. I’m quite happy with the result, and the blend of traditional craft and modern technology that was needed to produce it. I’ll say a bit more about the process here, and reveal the Secret Ingredient that makes the Moon Shot Espresso Cup unique. We went through a couple of iterations of the process, but I’ll summarize, merging images from different iterations.
3D Printing
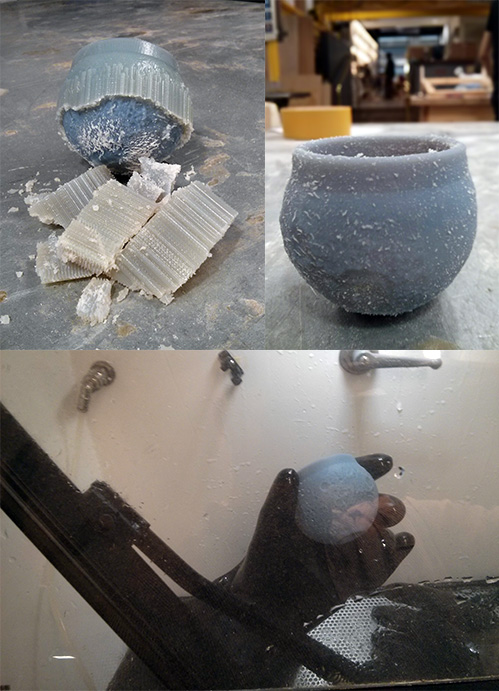
The first step, of course, is to 3D print the model. We printed the cup in high resolution plastic, using the Institute’s Objet 30. The cup emerges from the printer encased in a rubbery support material, which must be removed in several steps. First, larger chunks can be picked off by hand. Then, a high-pressure waterjet is used to remove everything down to a thin film. The film is boiled off in a bath of sodium hydroxide. (I may have the second and third steps reversed.)
Building a mould
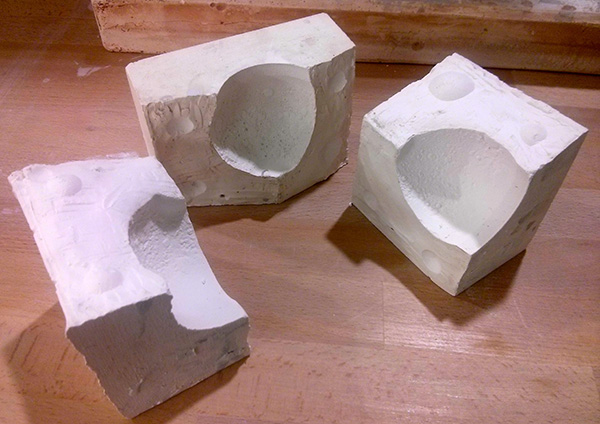
From this point onward, the process relies on fairly standard ceramic technology: we build a multi-part plaster mould of the cup, with which we can create clay positives via slipcasting. Our initial plans called for a complicated mould with a piece for the interior, allowing us to pour a double-walled cup through the bottom; but ultimately we opted for a simpler design in which we moulded just the outer wall, allowing the inner surface to form naturally as a layer of slip hardened against the plaster. For our first test pass we used a very simple two-part mould, and moved to a three-part mould for the final cup.
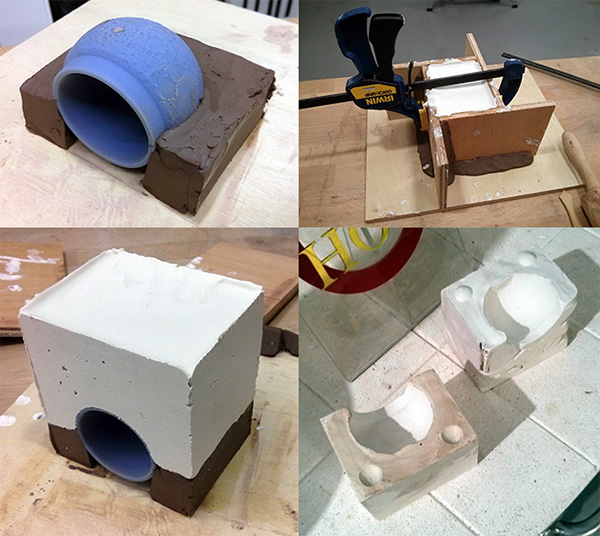
The first mould served a secondary purpose. Ceramic naturally shrinks when it is fired, and the amount of shrinkage is fairly hard to predict. We used this first run to attempt to calibrate against shrinkage, and print a second cup scaled up accordingly. The void in the second mould is therefore quite a bit bigger, though it’s hard to tell from the photographs.
Mixing the slip (and the Secret Ingredient!)
From the beginning, the plan was to use a special kind of slip called Parian. Parian is self-glazing, meaning that we wouldn’t lose any surface detail by having to apply a layer of glaze over all those beautiful craters. That would also allow us a final result with a bit more transparency and matte finish, both of which would help make the cup more moon-like.
Our early tests with Parian, using the two-part mould, resulted in a cup that was pure white, distractingly so. I decided to add a small amount of black stain to the slip to cut the whiteness. The stain is pretty potent: our first test cast, based on 2% stain by mass, resulted in cups that were almost black! I used much less stain the second time (1/2 tsp in 500 mL of slip), and ended up with cups that were more medium grey. If I repeat the process, I’ll cut the proportion of stain even further.
About halfway through the process, I realized that there was one ingredient that would truly add a touch of poetry to this cup: moon! I resolved to acquire a small piece of moon and add it to the clay. Now, moon isn’t that easy to come by. Basically all the samples brought back to earth by humans are the property of NASA, and not available to individuals. There’s a large supply a few hundred thousand kilometres away, but I didn’t have a good way to get there. Fortunately, many fragments of moon have found their way to earth in the form of meteorites. I found a local supplier, placed an order, and a few days later received a 16 mg fragment (i.e., a tiny pebble) of lunar meteorite NWA 4881 in the post.
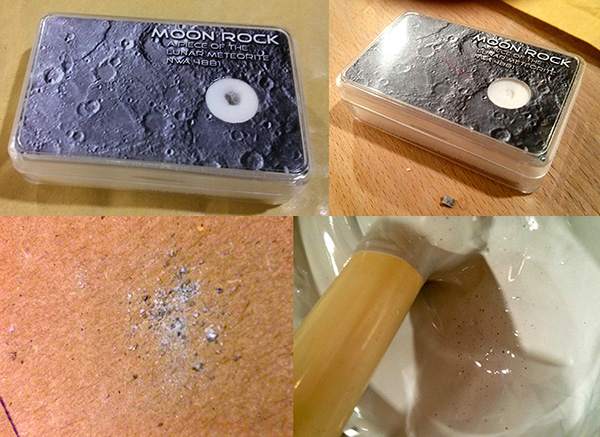
I agonized about how best to pulverize the sample (without losing any of it), as it turns out for far too long. I looked up grinders, mortars and pestles, and micronizing mills, and asked around for the right equipment on campus. As it turns out, I stuck the pebble into the finger of a rubber glove and pounded it with a hammer. I guess sometimes simple technology is the best kind.
Casting, firing and glazing
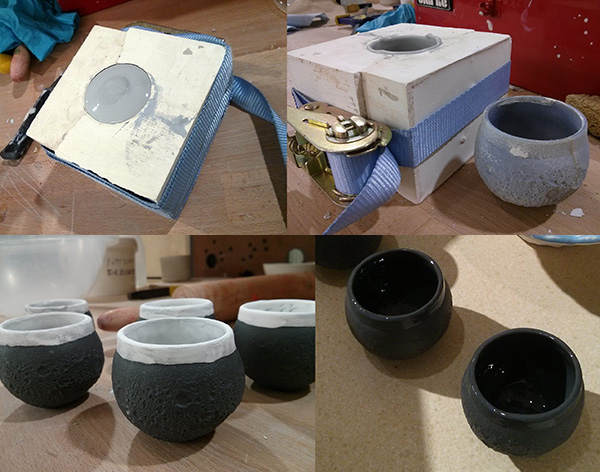
Slipcasting is a deeply satisfying interaction between plaster and clay. Pour the liquid slip into the mould. The plaster is extremely thirsty, and immediately starts to draw water out of the slip, hardening it. After about ten minutes, you can pour out the excess slip; the portion close to the plaster is already hard enough to form a thin shell. After another hour, the shell is firm enough to support its own weight, and can be ejected (carefully!) from the disassembled mould. After a day, the clay is hard. The next step is “fettling”, using fine tools to work the piece, to smooth away any seams or other defects. For this cup, I also had to eject lots of little balls of clay from the middles of craters; these were the result of air bubbles trapped between the model and plaster when the mould was first made. Finally, I scratched my initials into the bottom.
The first firing in the kiln turns the clay into ceramic (shrinking it in the process). After that’s done, I apply a transparent earthenware glaze to the inside of the cup and the outside of the lip and fire it again. The glaze further seals the ceramic, gives the inside a glassy shine, and makes the cup easier to drink from.
The final cups
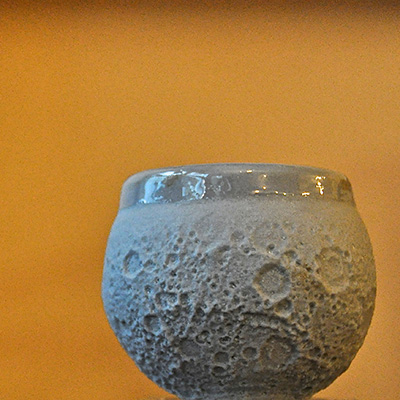
In the end, I managed to produce 14 cups—two very early rough drafts in pure white, five nearly black, and seven using real “moon slip”. Five of those seven were an even middle grey. For the other two I was running out of moon slip, and experimented by mixing grey and white. One has a thin layer of grey on the outside and a thicker layer of white on the inside; the other has a swirly mix of the two colours.
Even after supersizing the second 3D print, the final version of the cup is still too small after firing. Filled to the brim, the cup barely holds 60 ml of liquid, which isn’t really enough room to comfortably pull a double espresso. If I repeat this process, I’ll begin with a much larger initial print. Also, the cup gets fairly hot and doesn’t have a handle. When filled with boiling water the cup is too hot to hold; fortunately espresso is somewhat cooler, and the cup is manageable. Nevertheless, I might revisit the idea of a double-walled design in the future.
Despite these complaints, I’m quite happy with the result, which will stand as a suitable reminder and culmination of my year in London. In a way, the process really does represent my own personal Moon Shot: an attempt to build something big and complicated, starting with no knowledge of the process. Now, of course, I’m eager to try more experiments with 3D printing and ceramics in the future. I can only hope that the idea of an Institute of Making can be transplanted back to Canada.
A few final glamour shots of the cup appear below. A full set of images can be found in this flickr album.


Leave a Reply to Joseph Nasr Cancel reply